
Free Lesson
Lesson: Long-Tail Cast On
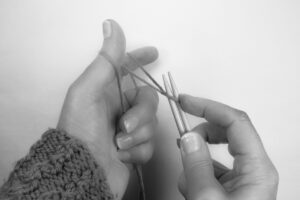
Lithuanians use a standard long-tail cast on, and the illustrations in knitting books always show the cast on worked with two needles held together. This makes the stitches on the cast on larger than normal, which makes knitting the first row much easier. You can get the same result by using a needle several sizes larger than the one you’ll be using to knit the piece.
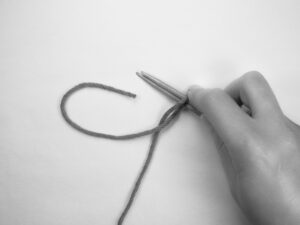
To get started, pull out a “long tail” of yarn—about four times the width of the piece you’ll be knitting, or about 1 inch (2.5cm) for each stitch you plan to cast on.
Long-Tail Cast On
Don’t make a slipknot.
There are several different ways to start a long-tail cast on without making a slipknot. Here’s how my grandmother taught me:
Hold the needles in your right hand and drape the long tail of yarn over the top of the needles so the tail is away from you (in the back) and the working yarn attached to the ball is near you (in the front). Cross the strands underneath the needles. This forms the first stitch, which at this point is just an unsecured loop around the needles.
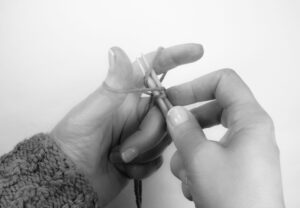
With the tail of the yarn over your left thumb and the yarn attached to the ball over your index finger, pull the strands open. Grasp the strands in your palm, and pull the needle down to form a “V” between your thumb and index finger. Notice that the yarn makes a loop around your thumb. You will knit into this loop as if it were a stitch.
After that, the process continues just like the long-tail cast-on techniques you’ll see in English-language knitting books:
1. Insert the needle into the loop on your thumb, from bottom to top.
2. Bring the needle around the near strand of yarn on your index finger from right to left and catch the yarn on the needle.

3. Pull the yarn back through the loop on your thumb from top to bottom.
4. Pull your thumb out of the loop. You now have another stitch on the needle. Reposition your thumb under the tail, and tug gently to tighten the new stitch on the needle. Do not let go of the strands held in your palm.
Repeat steps 1 to 4 until you have the required number of stitches on the needle. Remove the second needle and begin working.


 Experience level – advanced beginner
 After I finished my Arctic Lace Knitting Book, I finally allowed myself to explore the world of lace knitting and discovered that is is much more varied and elaborate than I could have imagined. Around the world and over time, knitters in different countries and regions have developed unique styles of lace knitting that range from easy-intermediate (like the knitting of the Oomingmak knitters) to advanced-insanely- difficult (like some of the Victorian patterns designed by English knitters). Other lace styles are used in Estonia, Russia, South America, Lithuania, Germany and Austria, and New Zealand. I’m sure there are even more, but these are the styles I’ve explored so far. – Donna Druchunas –


 Experience: All skill levels, basic knitting skills required.
 Have you ever wondered why some people can read charts easily and others find them incomprehensible? The truth is, charts are written in a code that can be deciphered by knitters who learn the symbols on the page and in their knitting. Charts do not use arbitrary symbols, but each symbol includes the instructions on how to make the indicated stitch! In this class, you will learn the secrets of interpreting chart symbols for texture and cable stitches.


I love this method, and you explained it, and demonstrated it perfectly! Thanks, Donna.
Thank you!
I love this method, and you explained it, and demonstrated it perfectly! Thanks, Donna.
Thank you!